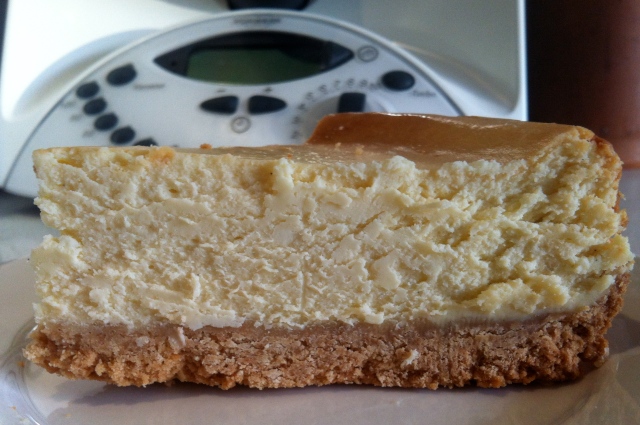
Last weekend was Easter, and the family and I were invited to an Easter Sunday dinner at my sister-in-law’s house. We had been asked to bring a dessert, and I thought I would try making a baked cheesecake in the Thermomix.
I found a recipe that looked quick and easy on the trusty Forum Thermomix, and got to work making it on Saturday night. For those people who don’t have a Thermomix, don’t despair, this recipe was converted from one originally published at Taste.
The cheesecake turned out great (Mr Foodfilanderer was seriously impressed) and was fun to make, so I thought I would share the recipe here.
New York Baked Cheesecake – Serves 10 – 12
Ingredients
- 1 x 250g packet of plain sweet biscuits (I used Arnotts Marie biscuits)
- 125g unsalted butter
- 750g cream cheese (leave out of the fridge for a hour or so to soften)
- 215g sugar (I used organic raw sugar)
- 1/2 tsp vanilla extract (I used vanilla bean paste instead)
- 2 tsp lemon rind
- 2 tbsp plain flour
- 4 eggs (I recommend free range organic eggs)
- 300ml sour cream
- Berries (to serve)
Method
1. Preheat the oven. The original recipe says to preheat at 160C, but as I was using a fan-forced oven I decided to cook it slowly at 140C.
2. Line the base of a 23cm springform pan with baking paper and grease the sides.
3. Place the biscuits into the Thermomix and mix for 10 seconds on Speed 5, or until finely crushed.
4. Add butter and mix for a further 10 seconds on Speed 5.
Note: I felt that the biscuit mixture looked a little drier than I’d expected, but it actually worked a treat.
5. Tip the biscuit mix into the prepared tin, and use a straight edged glass to press mixture firmly into the base of the tin. Try to compact the mixture as much as possible.
Note: The original recipe said to press the biscuit base into the sides of the tin as well, but I didn’t do this step. This meant that I had a slightly higher base than normal, but I didn’t feel that this detracted from the taste.
6. Place the tin in the fridge for 30 minutes so the base chills and firms.
7. Clean and dry the Thermomix bowl.
8. Add the sugar and lemon rind and mix for 10 seconds on Speed 8.
9. Add the softened cream cheese and vanilla and mix for 1 minute on Speed 4.
10. Scape down the edges of the Thermomix bowl with the spatula.
11. Add flour and mix for another 10 seconds on Speed 4.
12. Set the Thermomix to 1 minute on Speed 4 and slowly add the eggs, one at a time until fully combined.
13. Add the sour cream and fold in gently with the spatula until just combined.
14. Pour the mixture over the biscuit base.
15. Bake slowly in the preheated oven for around 75 – 90 minutes, or until it starts to go slightly brown on top and is set in the middle.
Note: I read on the packet of cream cheese that cheesecakes bake better in a moist environment, so I placed a small (ovenproof) bowl of water in the bottom of the oven while the cheesecake was cooking.
16. Once the cheesecake is done, turn the oven off and leave the cheesecake in there for 2 hours with the door slightly ajar.
17. Place the cheesecake into the fridge for at least 4 hours to chill.
Verdict: Although there may appear to be a lot of steps involved, this cheesecake takes very little effort to prepare and is seriously tasty. When I make it again, I will probably make a bit less base, rather than fiddling around with pushing the crumbs up the sides of the tin. I don’t think it’s necessary, and the cake looks pretty damn good without it.
Tip: Don’t be afraid of making this a day or two before you intend to use it, as the flavours get better over time!


Thanks I would like to make this soon. To make the filling do you just use the blades and not the butterfly?
Hi, I just used the blades for the filling.
I have made this cheesecake a few times now. I have one in the oven right now! It’s always a massive massive hit. Great recipe. Thank you!